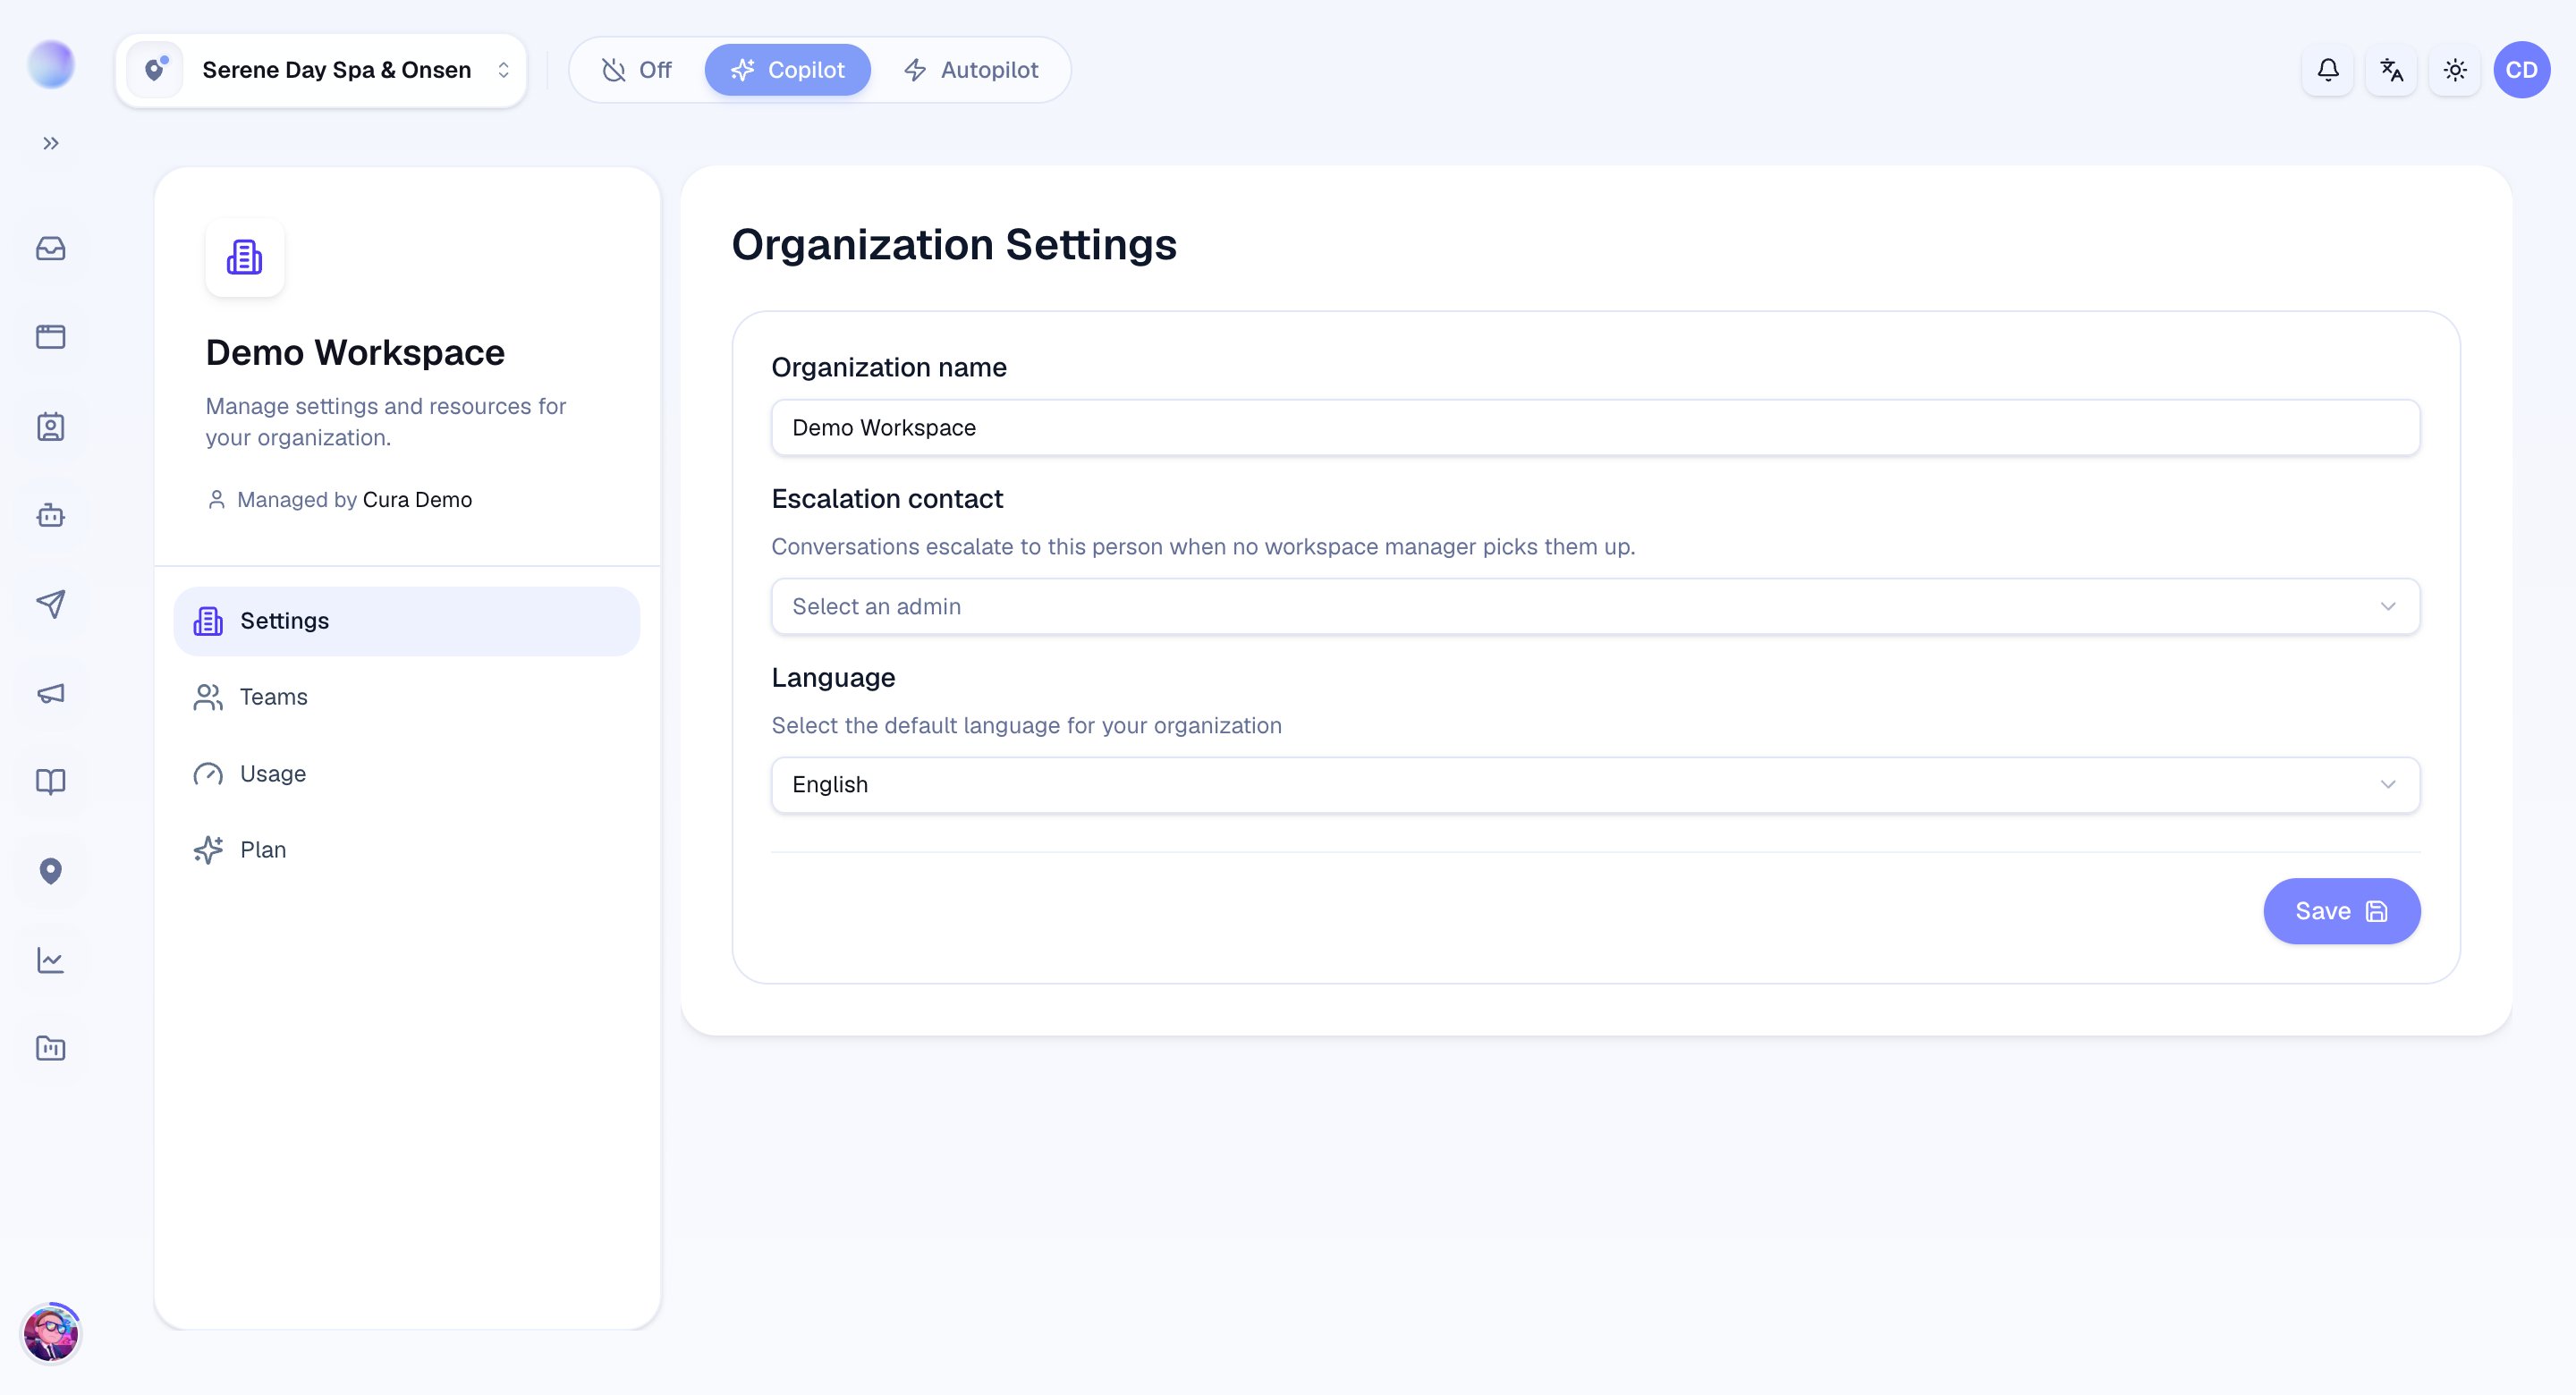

Before you begin
- You’ll need Admin access — organization settings are managed by an admin (you’ll see who under the organization name as Managed by).
- Decide which admin should receive escalations when the AI hands a conversation to a person.
Organization settings apply to your whole account. Details that change per location — location, timezone, contact details, Quiet Hours — live in Workspace settings instead.
1
Open organization settings
- Go to Settings → Organization.
- You’ll see the organization name at the top, with the admin who manages it shown beside it.
2
Set your organization name and description
- Organization name: use your company or brand name. This is how your business is identified across Cura.
- Description: a short line describing your business. Optional, but it helps keep things clear when your team grows.
- Click Save to apply your changes.
Your organization is named and ready for the rest of your team.
3
Choose your escalation manager
When the AI flags a conversation for a human (an escalation), Cura needs to know who to route it to.
- Escalation Manager: pick an admin from the list. This admin receives escalated conversations when no workspace manager is assigned to handle them — so they’re the organization-wide fallback.
- The list shows each admin’s name and email so you can pick the right one.
- Your choice saves the moment you select it — there’s no separate Save step for this field.
You can also set an escalation handler per workspace, which takes priority over this organization-level fallback. See Escalation contacts.
4
Set the language
- Language: choose English or ไทย (Thai) as the default interface language for your organization.
- Click Save to apply your name, description, and language together.
Your organization is configured. Naming, escalation routing, and language are all set.
What lives where
It’s easy to mix up the two levels of settings. A quick guide:- Organization settings — company-wide: name, description, escalation manager, default language.
- Workspace settings — per location: location, timezone, contact details, Quiet Hours, and the Knowledge Base.