

The profile panel
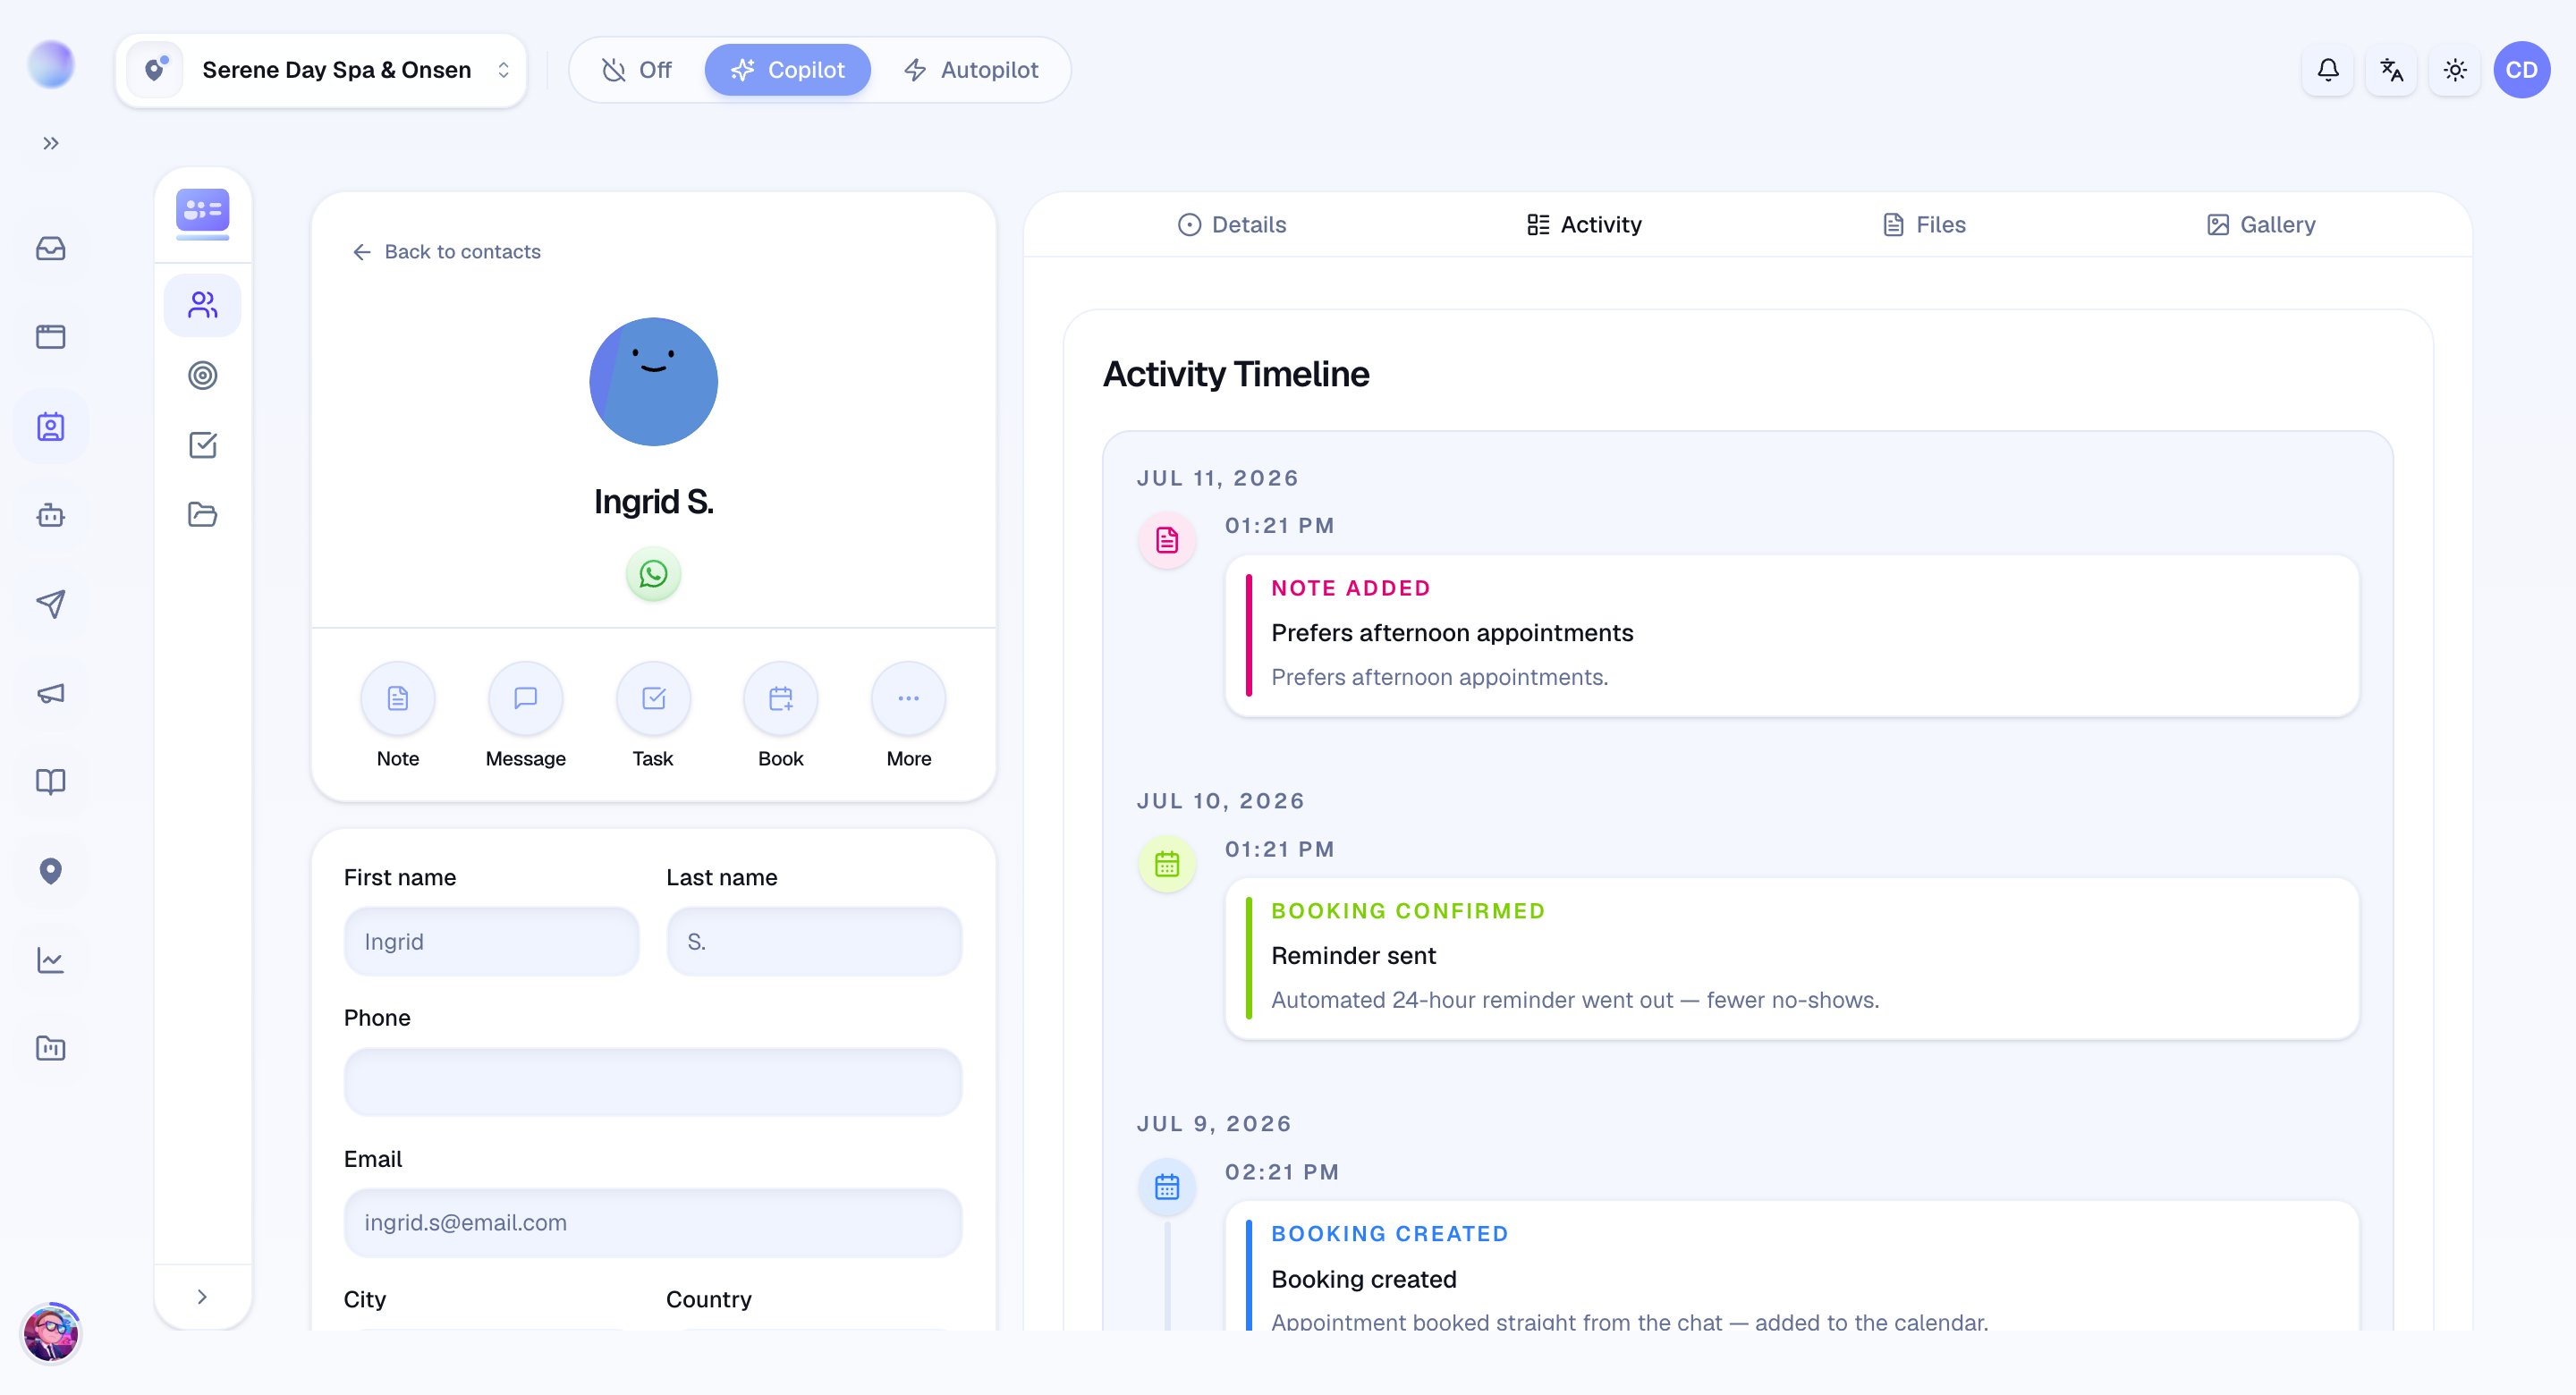
The left of the page is the contact’s profile — their name, phone, email, owner, stage, source, service interest, tier, and tags. Click any field to edit it; changes save instantly and flow into your filters, lists, and reports. The source records where the contact came from. You can set it by hand, but it’s also filled in for you: when a lead first messages you by clicking a Meta ad — Click-to-Messenger, Click-to-Instagram, or Click-to-WhatsApp — Cura stamps the source as Meta Ads automatically.An ad-attributed source is captured once, on the first ad click, and only when the contact has no source yet. To protect it, Cura won’t let a routine edit overwrite it silently — if you change the source away from Meta Ads, you’ll be asked to confirm. Editing any other field leaves the source untouched.
The activity timeline
At the heart of the page is a timeline of everything that’s happened with this customer — messages, stage changes, notes, and other activity, newest first. It’s the fastest way for anyone on the team to get up to speed before replying. For contacts who reached you through a Meta ad, the timeline also carries ad-referral entries. The first ad they clicked shows as Came from a Meta ad at the moment they first messaged you; if they later click another ad and message again, each re-engagement shows as Clicked … on its own date. Each entry names the ad (or the product it was about) and the channel it came from.The ad-attribution card
When a contact first reached you from a Meta ad, the detail page shows an Ad Attribution card. It surfaces the ad behind the acquisition so anyone replying knows exactly what the customer saw:- The channel — Messenger, Instagram, or WhatsApp — and a Meta Ads badge.
- The ad creative (image, or a video preview) when Meta provides one.
- The ad title, ad copy, and identifiers such as the ad ID.
- Matched context Cura uses to brief the AI on what the ad promised — the product, headline, offer, and key benefits.
- An ad journey list when the contact clicked more than one ad over time, with the first touch flagged.
Tabs for the full picture
The detail tabs let you dig into one area at a time:- Activity — the complete event history for this contact.
- Details — all profile fields, including custom attributes.
- Files — PDF documents attached to the contact (up to 2 MB each), each with a download link.
- Gallery — images shared in the relationship.
Deals and tasks
Alongside the profile you’ll find cards for the work attached to this person:- Deals — the opportunities tied to this contact and the stage each is in.
- Tasks — to-dos linked to the contact, with due dates and status. You can create a task right from here.
Adding a private note
Use Add note on the contact to jot down internal context — what was discussed, a reminder for whoever picks up next. The customer never sees it. Notes appear on the contact’s activity timeline, the same place private notes show up inside a conversation in the Inbox.A contact needs at least one conversation before you can add a note to it — the note is recorded on that conversation’s timeline. Brand-new contacts who haven’t messaged yet won’t have a conversation to attach a note to.
Lists and tags
The detail page also has a section for Lists and tags, so you can add this contact to a hand-picked List or apply a tag without leaving the page. See Lists and Custom attributes, tags, and tiers for more.Editing and tidying up
- Edit a field: click it, change the value, and it saves.
- Add a tag or List: use the Lists and tags section on the page.
- Add an attribute or file: use the Details and Files tabs.
- Archive a contact: remove someone from your active list without losing their history — you can unarchive them anytime.
Permanently deleting a contact is an admin-only action, and it removes their conversations, deals, tasks, and files too. For everyday tidying, archive instead — it’s reversible.