

Before you begin
- Open a conversation in the Inbox.
- Open the details panel on the right to find Conversation actions.
1
Open Conversation actions
In the details panel, expand Conversation actions. This is where you set the handler, owner, priority, and labels for the conversation.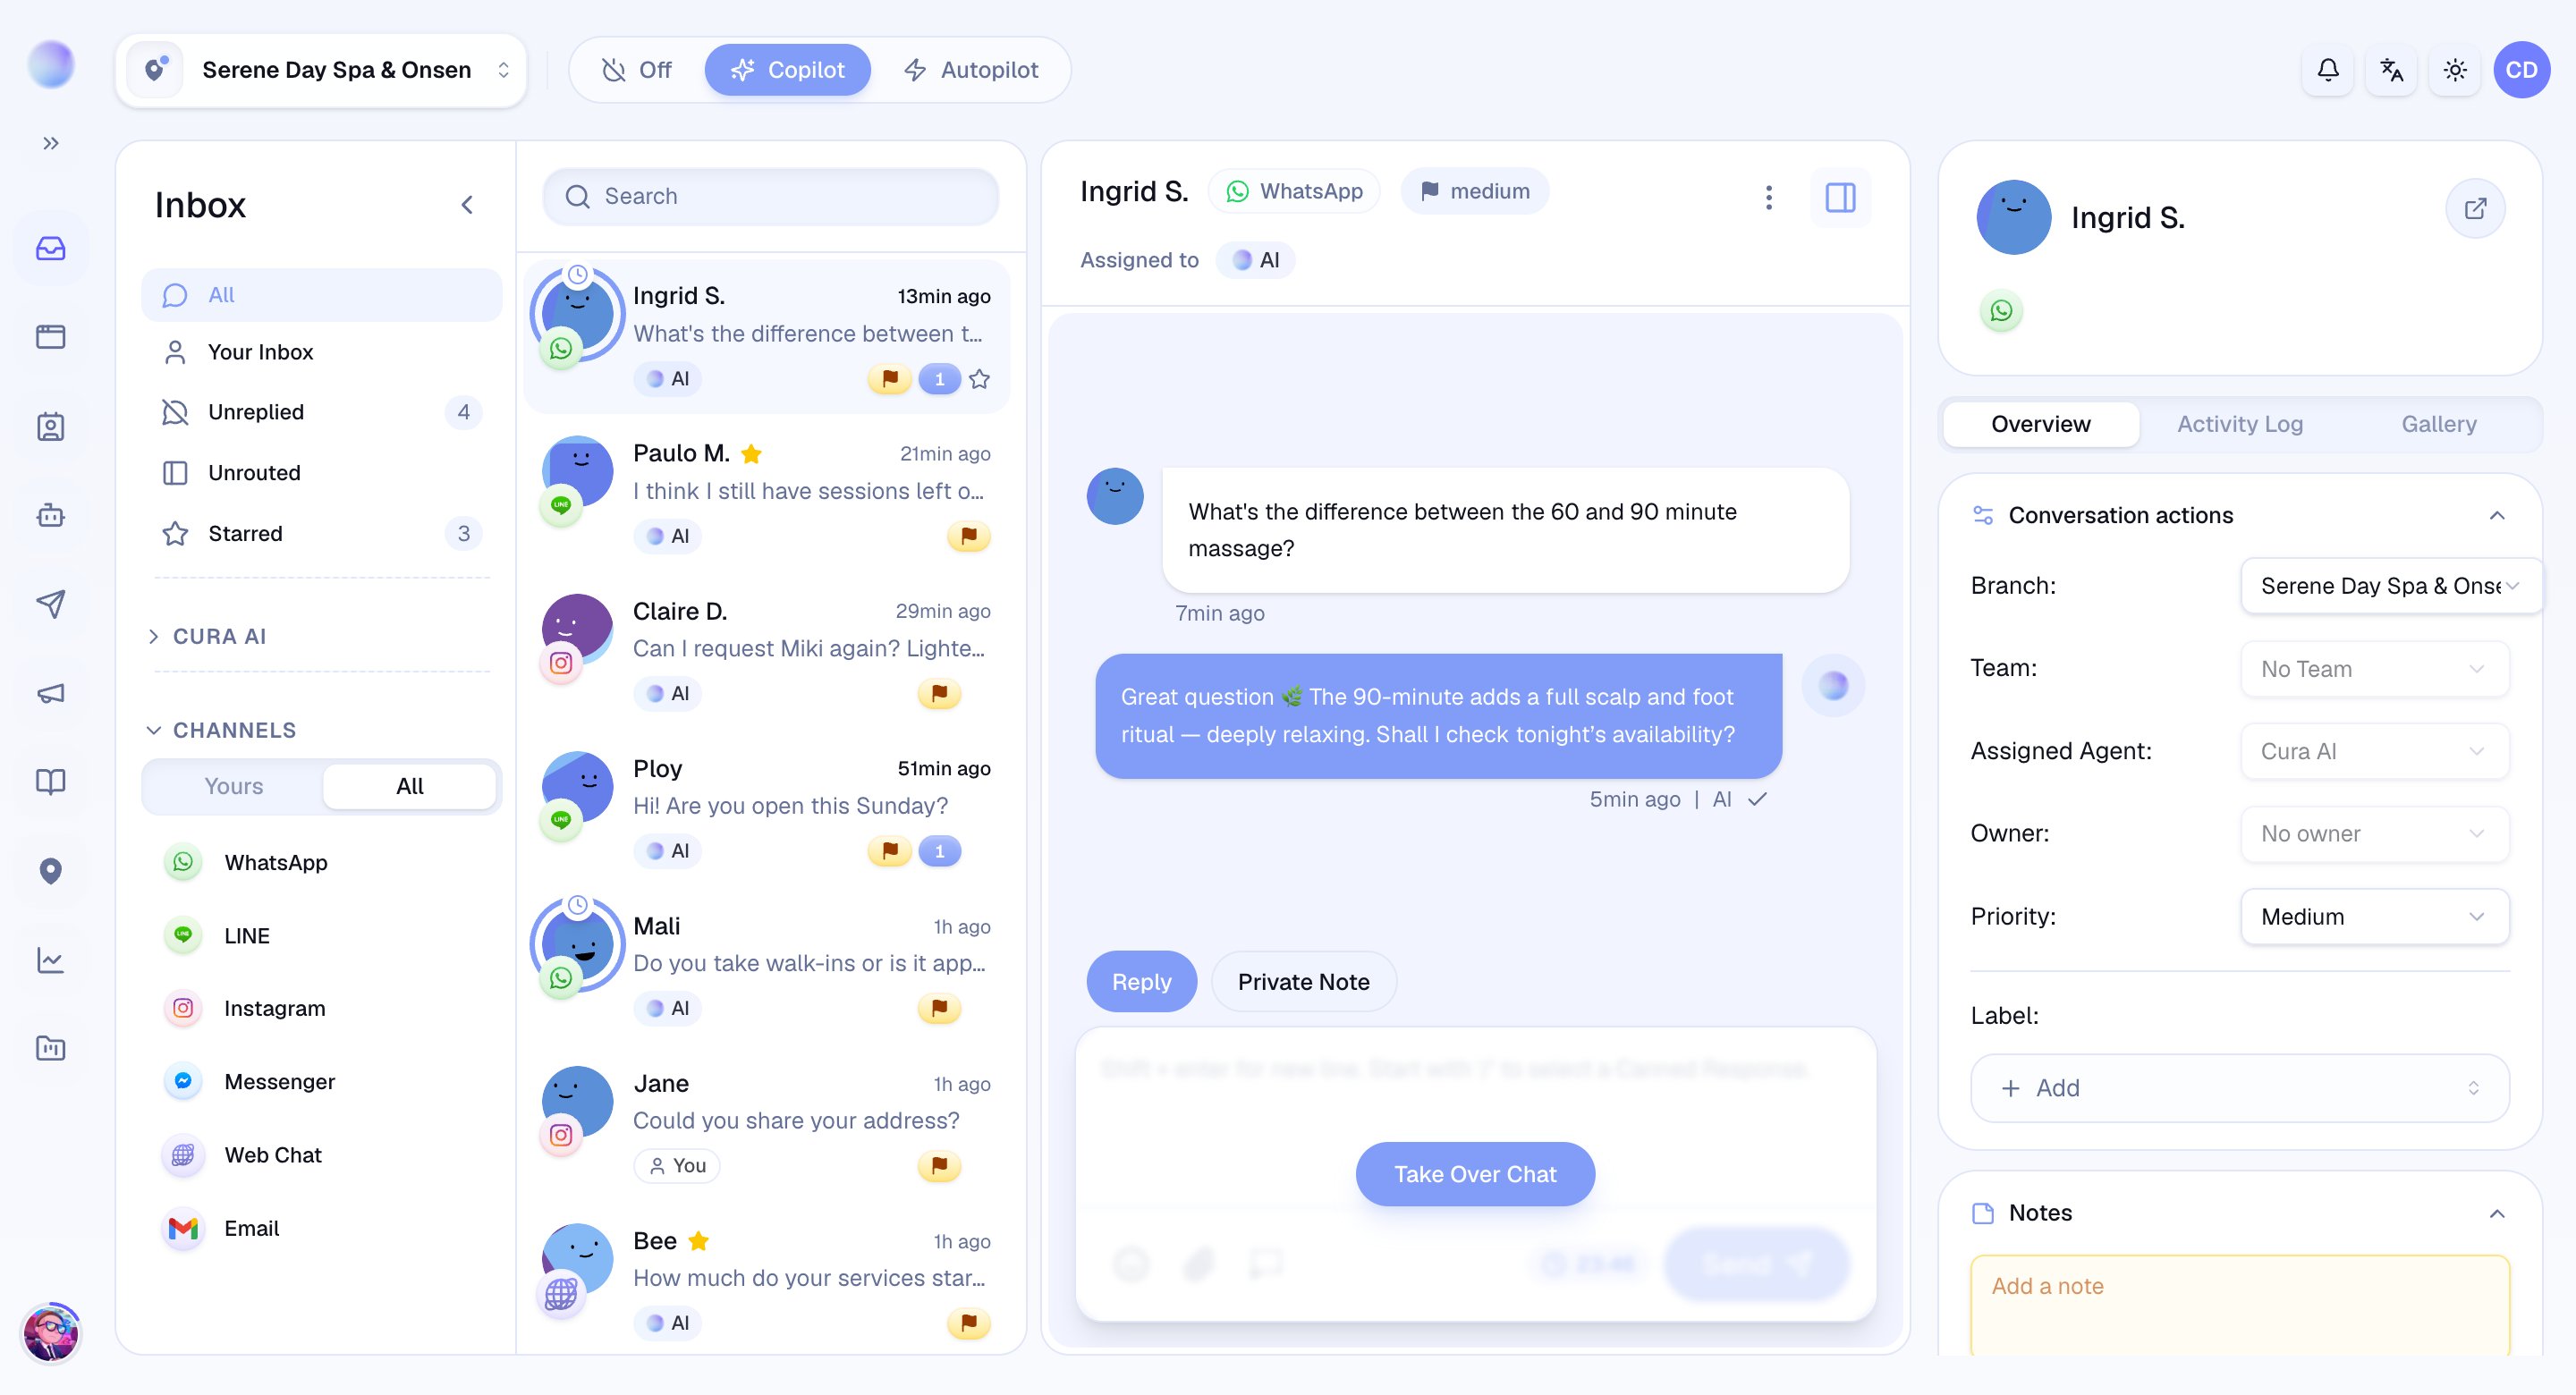
2
Set a priority
Find the Priority selector and choose a level:
- None — no special urgency (the default).
- Low — can wait.
- Medium — handle in good time.
- High — handle soon.
- Urgent — needs attention now.
3
Add a label
Under Label, you can tag the conversation with anything useful — a topic, a service, a campaign.
- Use an existing label: click Add, then pick one from the list.
- Create a new one: type a name and choose Create ”…”. It’s saved for next time, so your labels stay consistent across the team.
You’ve organized the conversation — it’s now easy to find and prioritize.
4
Remove a label
Labels show as small tags on the conversation. To remove one, click the ✕ on the tag.
Some labels are applied automatically by Cura — for example, when the AI escalates a conversation for a human. These help you spot conversations that need a person.